User Management
Add users based on the post and assign corresponding permissions to achieve easy management.
Adding User
- Log in to supOS, and then click
 at the upper-right corner to go to the design center.
 - Select User Security Management > User Management, and then click Add.
- Select a user type and then enter the information.
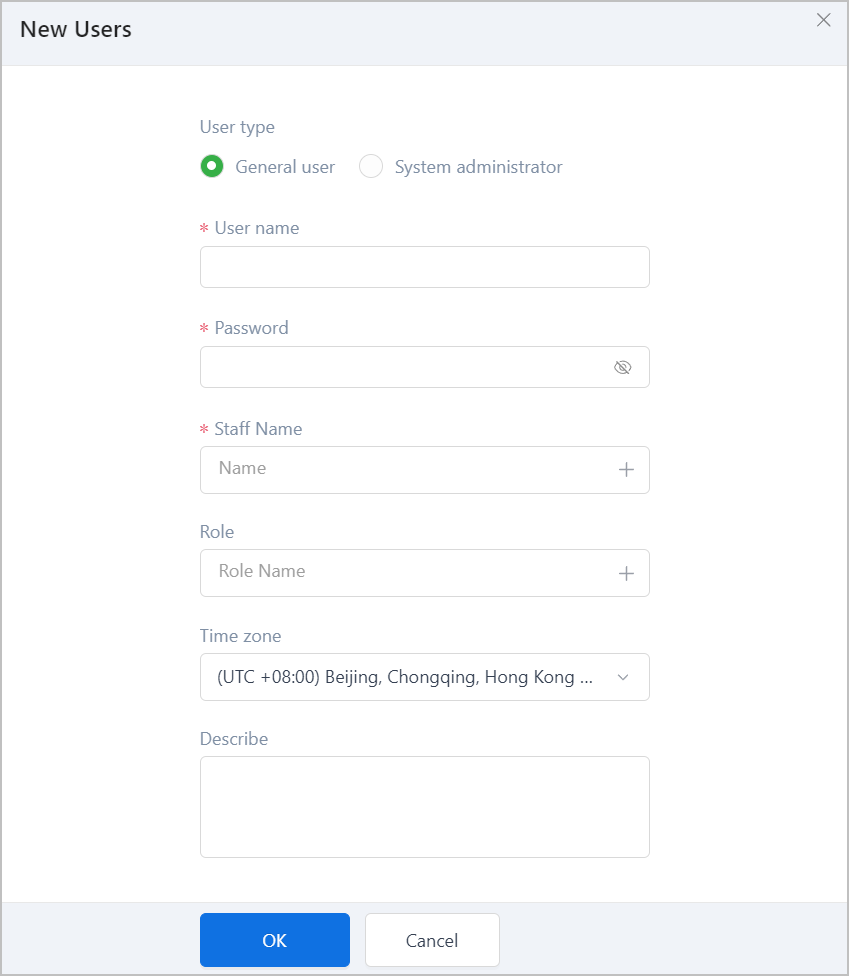
| Parameter | Description |
|---|---|
| User Type |
tip
|
| Username | Set the login username and password. info
|
| Password | |
| Staff Name | Select a personnel from the company organization. |
| Role | Select a role for the user. All permissions of the role are assigned to the user and cannot be changed. |
| Time Zone | Select the time zone where the user is located. |
| Describe | User description. |
- Click OK.
Other Operations
- Import user
- Click Import, select an import type and then click Download File Template.
- Fill in the template as required, and then click Import again and upload the file.

- Export user: Click Export, select the scope of export on the pop-up window and then click OK.
- Delete user: Select users and click
 , or click Delete under Operate to delete the corresponding user.
 - Lock/unlock user: Click the icon under Status to lock/unlock the corresponding user.info
The current user and admin cannot be manually locked.
- Reset password: Click Change password under Operate, and change the password.
Assigning Permission
Aside from the permissions of the role, you can assign extra permissions to the user.
- Admin can only assign permissions to users in the same company.
- Branch admin can only assign APP permissions to user after the system admin assigns APP permission to the branch.
- Log in to supOS, and then click at the upper-right corner to go to the design center.
- Select User Security Management > User Management, and then click Permission under Operate of a user.
- Function Permission: Permissions of functions on supOS.
- Select Function Permission, and then click User Permission.
- User Permission: Permissions manually assigned to the user.
- Inherited Permissions: Permissions inherited from roles.
- Select a component, and then select functions inside the component whose access you want to grant to user.
- Operation Center: Includes permissions of default APPs (Desktop and Business DIY in Business Designer), third party APPs and designed industrial APPs.
- Design Center: Permissions to access menus of the design center.
- Permission Assigned: Permissions assigned to the user.
- Click Assign Permission at the upper-right corner to assign the selected function permissions to the current user.
tip
Click  next to Sync to user, you can select users in the company and assign the selected permissions to them. Up to 10 users and 50 permission can be assigned at the same time.
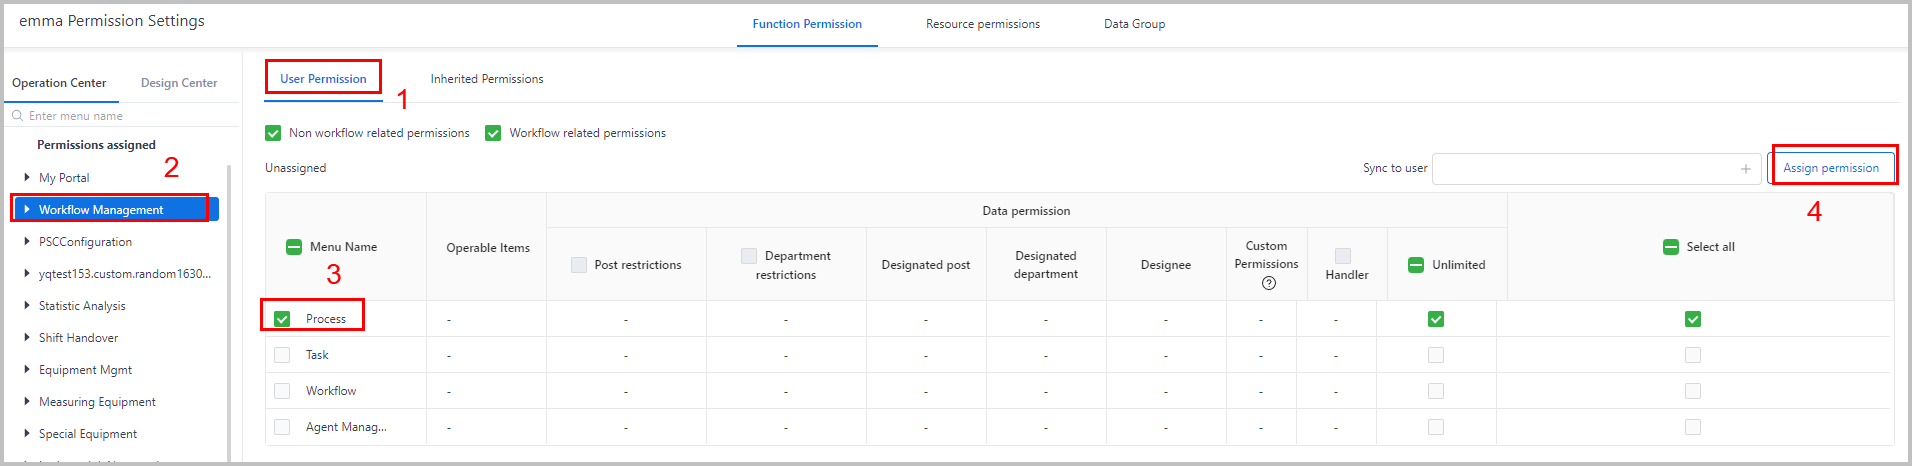
tip
You can select an assigned permission, and click the trash bin at the upper-right corner to delete it.
- Resource Permission: Permissions to access resources of third-party apps after installation through API.info
This tab can only be seen when resource permission is enabled under System Configuration > System Settings > Resource permission config.
- Select Resource Permission, and then click
 to add a resource set.
 - Enter the resource set information, and then click OK. The callback address is the API supOS uses to access APP resources.
- Select the added resource, and then click Assign Permission at the upper-right corner.
tip
Enable Parent-child linkage, when parent resources is selected, sub resources are selected by default.

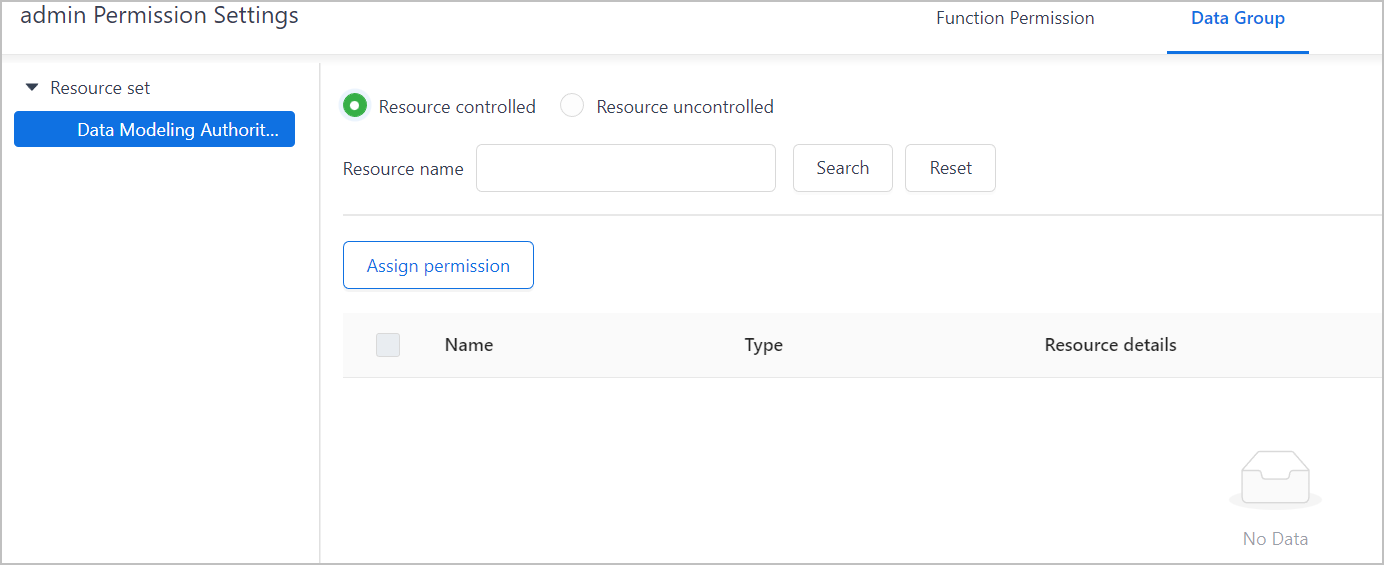
- Data Group: Persmissions of object models.
- Click the Data Group tab.
- Resource Controlled: Assign data permissions based on the selected data group. It is the default option for all general users.
- Resource Uncontrolled: Assign all data permissions. It is the default option for admin.
- Select the data modeling permission, and then click Assign Permission.